Thursday, March 14, 2013

Visit the Library

Day 12: A Trip to the Library

If you didn't know, March is Reading Month. This is a perfect opportunity to visit your local library.
Our local libraries are treasures that are so often overlooked.

Personally, my town library is extremely small--it is housed in the back of the town fire hall. With that being said, my kids love going there. Their faces light up on our trips there. And, as soon as we get home, they want to read every book we checked out. Our house is full of books, but our books just aren't the same as the books from the library. There is a heightened sense of urgency to read the books they just checked out.

I challenge you to take your children to the library. I bet you will see the same excitement. Reading 20 minutes a day will give your kids an education and vocabulary that will amaze you. Use the library to help build a love for books! Your kids will thank you.

Shamrock Rice Krispie Treats

Day 11: Mix about 5 cups of Rice Krispie cereal, a handful of green candies (I used M&Ms), and some green sprinkles together.


Over medium-high heat, melt 1/4 cup of butter in a tall saucepan. Add 5 cups of marshmallows. Put in 2-4 drops of green food coloring. Stir until marshmallows are melted.


Remove from heat. Stir in cereal mixture.

 
Dump the mixture on a baking sheet. Spray a shamrock cookie cutter with cooking spray and cut out your shapes.

Monday, March 11, 2013

Indoor Baseball

This is the time of year that my boys get "spring fever". They can't wait for baseball season to start, but it is too wet and cold to play it outside. So...we created indoor baseball with a balloon and a soft baseball bat. It is especially good for my 4-year-old. It has really helped him work on his batting stance and how to keep his eye on the "ball".  Even my 1 1/2-year-old has started taking swings with the bat.  We all take turns being the pitcher and outfielders. It really is a fun family game.
 
(They haven't broken anything, and they have played a lot of games. The balloon really is harmless.)


Sunday, March 10, 2013

Pot of Gold Cake Pops and Cupcakes

For Day 10 of our Pot o' Activities we made pot of gold cupcakes and cake pops.

After baking the cake pops, I dipped them in chocolate, sprinkled them with gold sugar, and put in a rainbow airhead.


The pot of gold cupcakes could be done with any type of cake. I chose pumpkin cheesecake cupcakes.

To make those cupcakes, blend a spice cake mix (and the ingredients the box calls for), one small package of vanilla instant pudding, and one cup of canned pumpkin.  

Pour the cake mixture into cupcake liners. Then beat up one 8 oz. package of cream cheese, 1/4 cup of sugar, and one egg. Drop a spoonful of the cheesecake mixture each cupcake. Bake at 350 degrees for about 20 minutes. (This is a Kraft Food recipe.)

After the cupcakes cooled, I spread a thin layer of white frosting on the cupcakes, sprinkled them with the gold sugar, and topped them with a rainbow airhead.

Easter Bunny Crafts

Days 8 and 9 of our Pot o'Activities
We did these crafts together because the kids decided they wanted to spend the night at Grandpa and Grandma's Friday night. It actually worked pretty well doing them together because they use similar supplies.
The one on the left is made from a toilet paper roll and the one on the right is a tin can. The kids painted both of them white.
While they dried, they cut out ears out of construction paper and scrapbook paper. The ears are glued on with tacky glue.
The boys wanted their toilet paper roll bunny to have red spots, so that is what they did. :)
We glued on pom-poms for the nose and mouth, glued pipe cleaners on for the whiskers, and glued on some eyes. These are very simple crafts that can be done in about 15 minutes.
 

Saturday, March 9, 2013

Taco Ring

This is an extremely easy meal, or is great for an appetizer when entertaining.

Just brown up about a pound of hamburger. Drain the grease and add taco seasoning and the amount of water the package calls for.

Add 1 1/4 cup of shredded cheddar cheese to the meat. Let it melt in with the taco meat.

Take two tubes of crescent rolls and line them up around a baking stone (or any baking sheet will work).  Let the pointed end of each crescent roll hang over the edge of the pan. Put a scoop of the meat/cheese mixture on the larger end of each crescent roll.

Pull the pointed end over the meat/cheese scoop and press to seal the crescent roll.

Bake at 375 degrees for about 15 minutes. Top with your favorite taco toppings: lettuce, tomatoes, sour cream, salsa, onions, jalapenos, etc.

Friday, March 8, 2013

Emoticon Cupcakes

After three days of state testing, a fellow teacher and I decided we would reward the kids with a little treat. She made some cookies and I came up with these cupcakes. I call them "The Many Faces of the ACT"
 
The kids really got a kick out of picking out a face that fit them the best.
 
The faces are drawn on with a tube of black food gel.


Breakfast Burritos

This simple meal works great not just for breakfast, but for dinner as well. It comes together quickly after a busy day at work, the kids love it, and these are ingredients I usually have on hand.
 
I make scrambled eggs and bacon or sausage. The two younger kids can't eat things in a taco shell very well, so they just eat the eggs and meat. The rest of us then set out to create our individual burritos.
 
I put the eggs and meat, shredded cheese, sour cream, and salsa in mine. This meal comes together in less than 20 minutes.  
 

Easy Smoothies

Smoothies
Your kids will love this simple snack any night of the week. (And...it's good for them!)
All I do is take a couple of containers of yogurt--any brand or flavor will work. For this one, I used Yoplait Greek Strawberry. I put them in the bottom of the blender. I added about 1/4-1/2 cup of V-Fusion juice. (Any juice will work.)
I had some fresh fruit on hand, so I put in about half of a pint of blueberries and 1/3 of a lb of strawberries. If the fresh fruit isn't on sale, or I don't have any, I put in frozen fruit. To make the fresh fruit smoothie a little colder, I add a little bit of ice in the blender (about 1/2 cup). Get creative with the fruit combos. I haven't had one that I don't like.
Simply blend it up and serve. I don't add any other sweetener to this.


Thursday, March 7, 2013

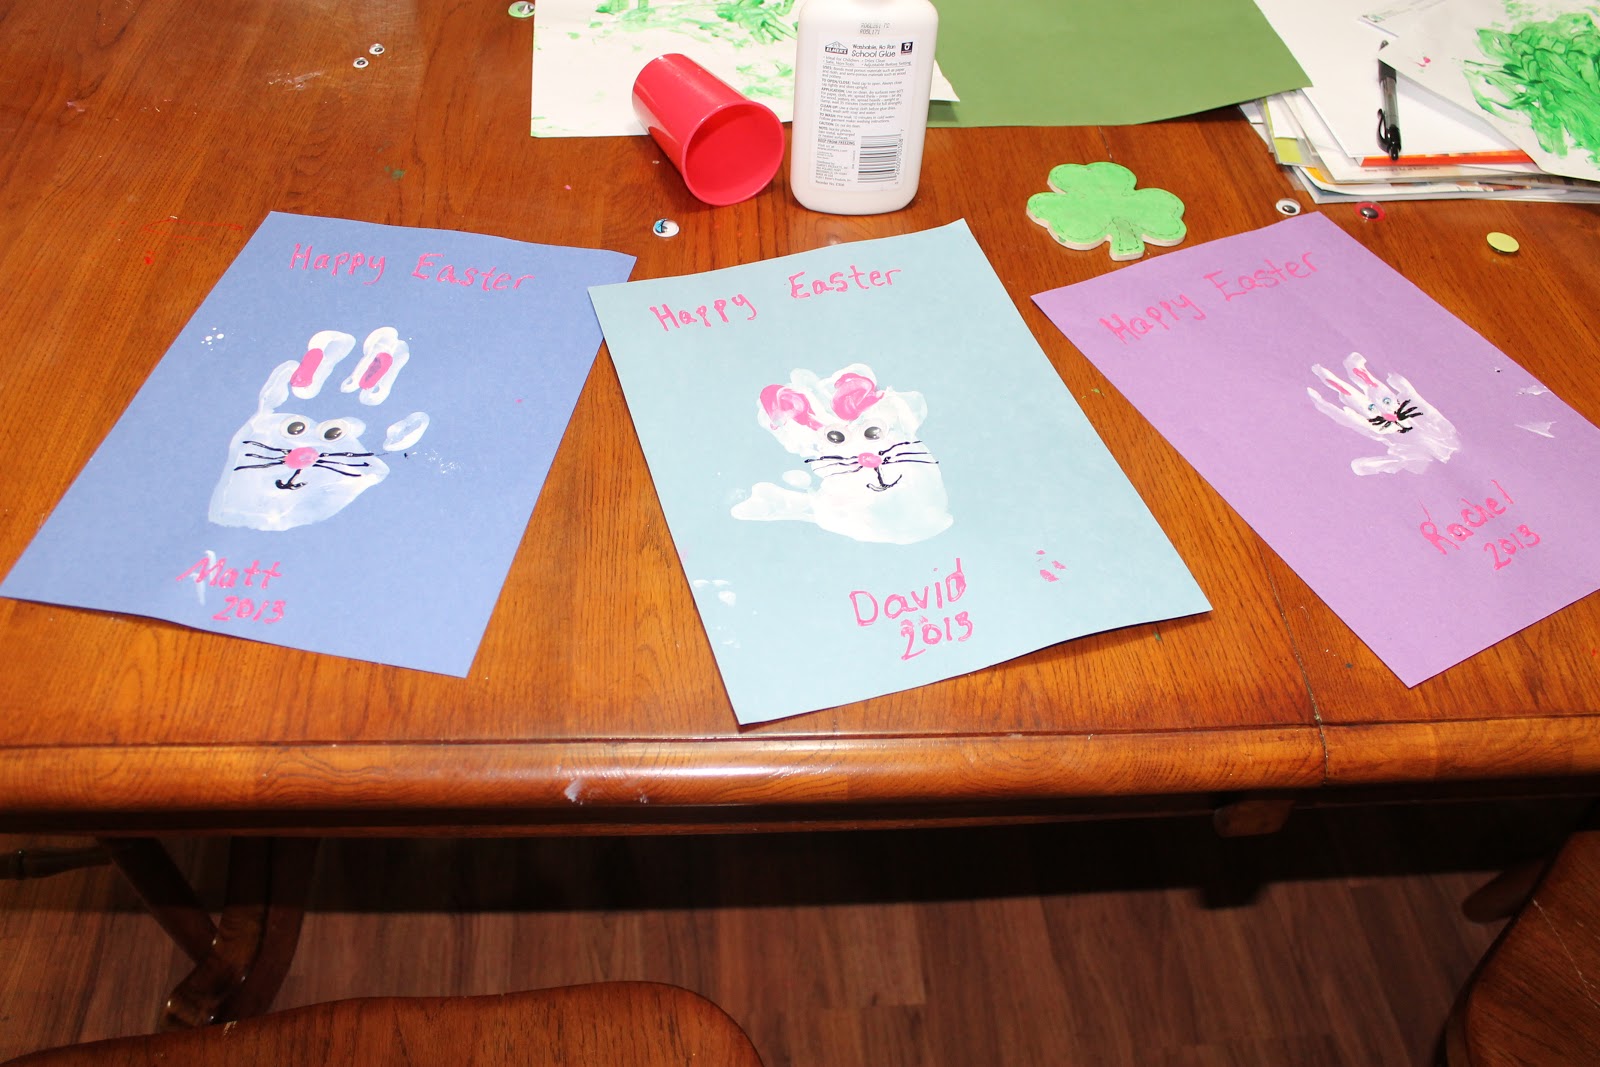
Easter Handprints

Day 7-Pot o'Activities: Easter Handprint Masterpieces

This is the second year we have made these Easter cards. I plan to keep them through the years and compare how their handprints have grown. My ten-year-old was already amazed to see how much his hand grew from last year.


First, we put some white finger paint on a little paper plate. The kids pressed their hands in the paint and then transferred their print to the piece of construction paper. I wrote "Happy Easter", their name, and the year in fabric paint.--this could be done with any paint or marker.

After the white paint dried, I put a little drop of pink paint for each of the ears. The kids used their fingers to make lines. Then they made a little fingerprint for the nose out of pink paint. We used a black paint pen for the whiskers and mouth and glued on little crafting eyes. However, a marker could also be used for all the facial features.

Pot o'Activities- Days 5 and 6

Day 5: Green Bubble Bath

I didn't take any pictures of this, but it was really easy to do. I dropped a couple drops of food coloring in the tub. Don't put too much in or it will color their skin. I have found tinting drops for the bathtub at Wal-Mart if you are hesitant to color the water with food coloring.


Day 6: Painting Shamrock Ornaments
I found some 50-cent wooden shamrocks at Hobby Lobby for this craft. I only had two though, so if you can't find these, you can just do what I did with Rachel's. Her ornament is just a piece of paper with a shamrock traced on it. We cut the shamrock out when she was done. (Makes less of a mess too!) I really believe that having some good washable finger-paint is a must in all houses with kids. They love to explore the textures and to see what they can create using their hands. My kids treasure these "masterpieces" they can call their own. And they really do clean up pretty easily. Just have a washcloth ready! I use a little paper plate to put their paint colors on. This will also help lessen the mess.


Tuesday, March 5, 2013

Number Sticks

When my mother-in-law, Ruth, came to stay with the kids on Monday, David took pieces of the play dough we made Friday night to create "Number Sticks".

He stuck uncooked spaghetti noodles into the play dough.

Next to each of the piles,  Ruth put various numbers down.

Next to one of the piles she wrote, "A Pattern".

David had to count out Fruit Loops to place the correct number on each "Number Stick". He created a pattern of colors on the one next to "A Pattern".

With this visual, we are able to ask him questions like, "Which number is greater/more", Which number is the smallest", etc. This is a great way to introduce simple mathematics terms that will help him solve mathematic problems in early elementary.

The play dough has since molded around the spaghetti. We can now just interchange the numbers and ideas around the sticks and continue the counting lesson.

Monday, March 4, 2013

Shamrock Collage

Day 4 of our Pot o'Activities: Shamrock Collages

This activity worked great for tonight because we didn't have a lot of time at home before the kids' bedtime.

We started by tracing one of the shamrocks from our activity wall: http://workingmomwonders.blogspot.com/2013/02/st-patricks-day-pot-o-activities.html

The boys then set out to find "green" things from magazines. They also cut out shapes from different shades of green tissue paper.

 
Then they pasted the green shapes onto their shamrock. That's it...project completed. (Well...except for the picture of the Geico gecko I have to find tomorrow for David's collage--the four-year-old. His brother has one on his collage, so David thinks his won't be complete without one either!)


Teacher Luncheon Decorations

I attended a Ladies Luncheon yesterday with some of my colleagues. The leader for each of the tables had to come up with a theme for their group. Because we are/were all teachers, my friend, Corinne, decided to find things that pertained to teaching to decorate our table. (I thought our table was the best decorated, so I had to share all of the ideas.)

First she created a pencil centerpiece (stacked on Literature books, of course).

Next, she made crayon jars filled with goodies (they doubled as a take-home gift for each attendee.) The crayons are hot-glued around a mason jar and tied with ribbon.

My kids are now using it as a storing device for their own crayons.

The placemats are pieces of construction paper and bulletin board border laminated together.

If you look at the top of the placemat below, you will also see a pencil. The pencils were made for each of the guests using a package of Spree candy and a Hershey kiss. The pencil part is covered with tan/yellow construction paper, and the eraser is covered with pink construction paper.
 
My contribution to the event was apple cupcakes.
These were incredibly easy to make...
I found red cupcake liners at Wal-Mart. I used a red velvet cake mix for the cupcake part.
I colored cream cheese frosting with red food gel and piped it on the cupcake using a sandwich bag. The stem is a green apple pull-apart Twizzler, and the leaf is frosting tinted green. (I piped that on using a leaf tip and a plastic bag.) The apple part is sprinkled with red sugar and the leaf is sprinkled with green sugar to help it stand out more.
 
This was such a fun event and a great chance to catch up with some of my best friends. Corinne did a wonderful job creating a "Teacher" theme for us at our table. (If it was a competition, I am sure our table would have won 1st place!)

Jelly Bean Prayer Eggs

Day 3 Pot o' Activities---I found this prayer on Pinterest and thought it was a great way to teach the Easter lesson to my kids and to have them share it with others.
 
We started by picking out red, green, yellow, orange, black, white, purple, and pink jelly beans. We put each color in the five plastic eggs we were making. Together we read what each color represents and talked about what it means.
 
 
My 10-year-old wrote the prayer on his cards to give away, and I wrote the 4-year-old's cards while he picked out the crayons for each color. We wrote the color word in the corresponding crayon color. The prayer is written on a piece of Easter scrapbook paper that has been cut and folded.
 
 
The Jelly Bean Prayer
Author: Unknown
Red is for the blood he gave,
Green is for the grass he made.
Yellow is for the sun so bright,
Orange is for the edge of the night.
Black is for the sins we made,
White is for the grace he gave.
Purple is for his hour of sorrow,
Pink is for our new tomorrow.
An egg full of jelly beans, colorful and sweet, is a prayer, is a promise, is a special treat.

May the joy of Christ's Resurrection fill your heart and bless your life.


We taped the card to the egg and have started to deliver them to the people the boys chose as the recipients.  

Saturday, March 2, 2013

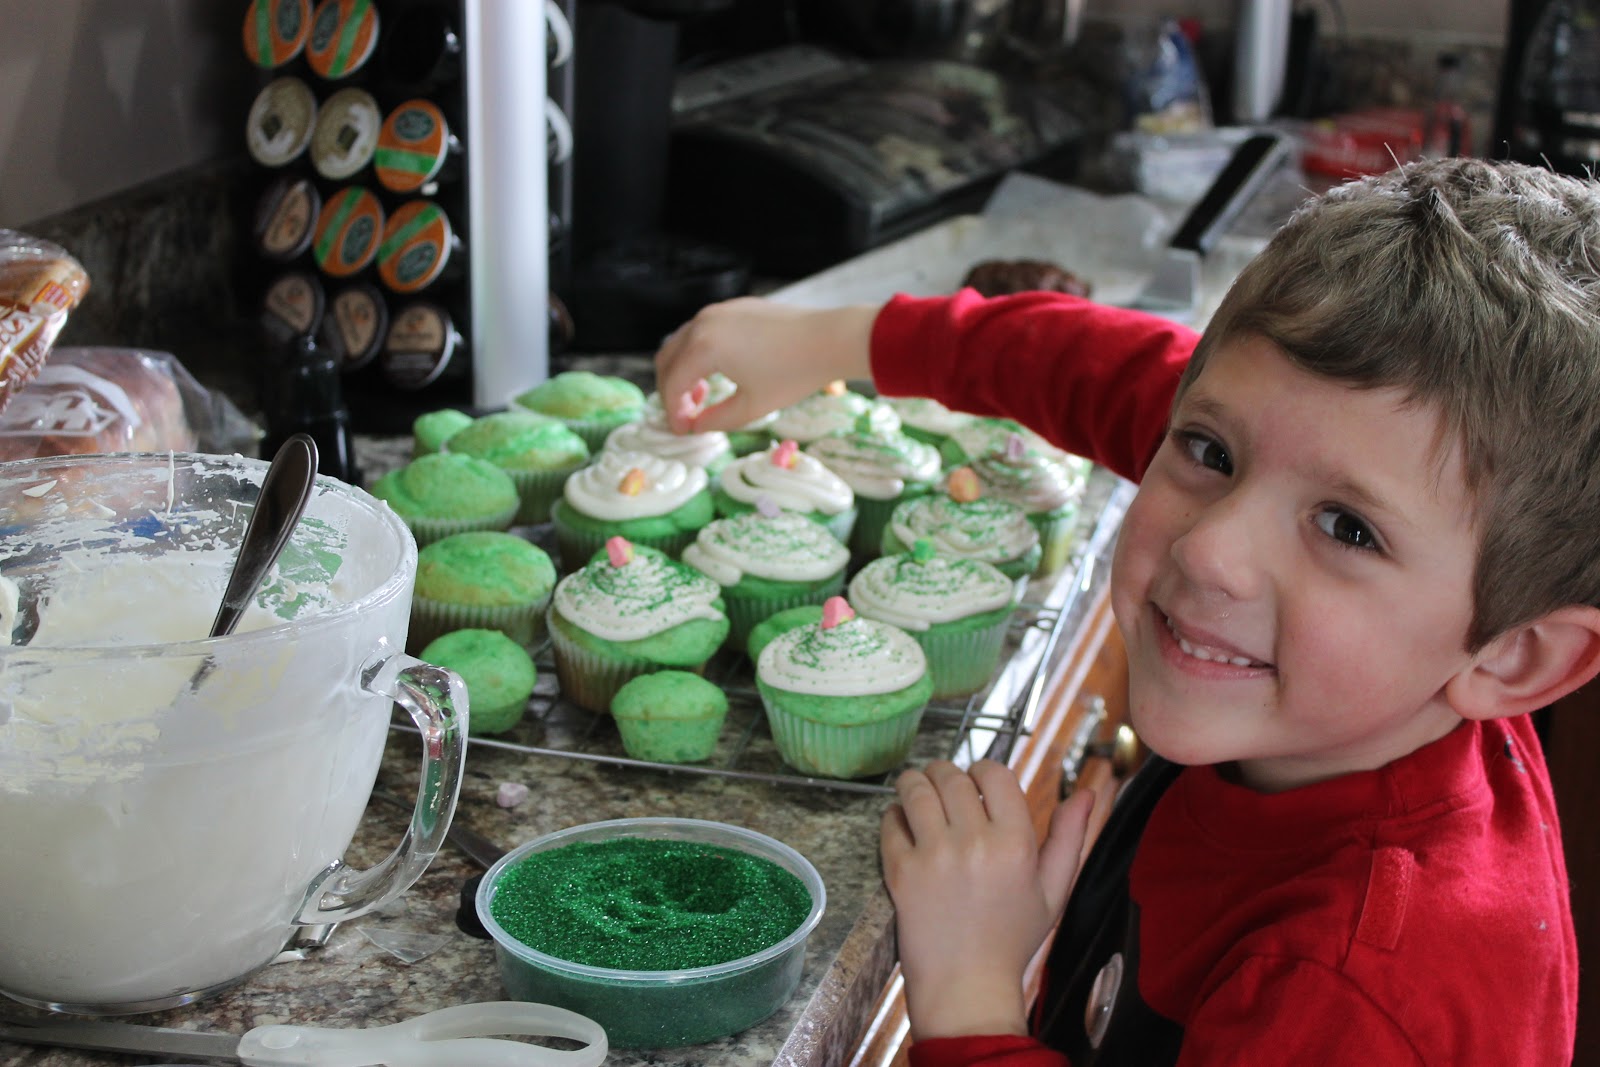
Lucky Charm Cupcakes

St. Patrick's Day Pot o' Activity Day 2: Lucky Charm Cupcakes

I found this recipe off of Pinterest. (http://www.justcallmemaria.com/2012/03/lucky-charms-cupcakes.html)

They looked so cute; we just had to try them!


1 box white cake mix
3 eggs
¾ cup sour cream
¾ cup milk
1/3 vegetable oil
½ tsp vanilla extract
½ cup finely crushed Lucky Charms (cereal pieces only, no marshmallows)
~25 drops green food coloring

Marshmallow Buttercream

4 ½ cups powdered sugar
1 tsp vanilla
1 cup room temperature unsalted butter
1 (13 oz) container marshmallow fluff
  1. Preheat oven to 350 degrees and line cupcake pans with liners. If you use mini muffin pans, grease the pan with some oil.
In a large bowl blend cake mix, eggs, sour cream, milk, oil, and vanilla extract.
Mix in drops of green food coloring
Mix in finely crushed Lucky Charms crumbs until combined.
Fill cupcake liners 3/4 full with batter and bake 15 minutes, or until a toothpick inserted into a cupcake comes out clean.
Take cupcakes out and let cool completely.
For the frosting:
 
In a medium bowl beat room temperature butter with an electric mixer.
 
Add two cups of the powdered sugar, the vanilla, and the marshmallow fluff and mix until smooth.
 
Continue to add the powdered sugar, a half cup at a time, mixing between each addition.
 
Pipe onto each cooled cupcake. Top with green sprinkles and a Lucky Charms marshmallow (do not top with Lucky Charm marshmallow until ready to eat).
 

Friday, March 1, 2013

Microwave Play Dough


Day 1 of our St. Patrick's Day Pot o' Activities: Green Playdough!http://workingmomwonders.blogspot.com/2013/02/st-patricks-day-pot-o-activities.html

My kids love to create things with play dough. This recipe is inexpensive, easy, and fun all in one. Plus, this can be used over and over again, so the fun will continue.

This recipe actually is used in a lot of preschools because it takes away the "stove" portion of a lot of the play dough recipes out there.

To start, put 2 cups of flour, 2 Tablespoons of oil, 1 cup of salt, 2 cups of water, and 1 Tablespoon of cream of tartar. Mix that in a microwavable bowl with a whisk.


Next, add the food coloring. (Not sure how many drops because David just started squeezing. You can't really do this step wrong. Let the kids have fun!)


He did really well with the color. You do need quite a few drops.


Next, place it in the microwave for 1 minute. Pull it out and stir. Place back in for another minute. Continue this until the mixture becomes a dough. It took mine 4 minutes with an added 20 seconds.


When you pull the dough from the bowl, it becomes very soft and pliable. David first started by using the rolling pin and cookie cutters to make his shamrocks. When he was done with that, he pulled out his other play dough accessories and had a great time.


This recipe makes a good size batch of dough. If you want more colors, just separate the dough before microwaving. Do different colors in stages. Overall, this was a successful "first day" of our March activities. :)

To help the play dough last longer, keep it sealed in a ziploc bag.