Wednesday, January 29, 2014

2014 Super Bowl Commercial Bingo Cards

Rachael Ray brought up a lot of great ideas for Super Bowl parties on her show yesterday. One that caught my attention was Super Bowl Commercial Bingo. There is a link to her cards on her website: http://www.rachaelraymag.com/in-the-magazine/january-february-2013-table-of-contents/

My 5-year-old can't read these words yet, so I made my own Super Bowl Commercial Bingo cards, complete with pictures so he can do this game on his own. 

On the website http://adage.com/article/special-report-super-bowl/super-bowl-ad-chart-buying-super-bowl-2014/244024/, I found a listing of the commercials and what time during the game they will be aired. I found images of all the ads that are supposed to be aired during the first half. (Because most kids will have to be in bed before the end of the game.) 

I added some Bronco and Seahawk Free Space squares as well. I moved the images around on a second card so my boys have different cards. If you would like this template, comment below with your email address. 


Monday, January 27, 2014

Valentine's Day Sensory Box

This is our Valentine's Day sensory box from last year. These boxes store very well, and the kids enjoyed having this one back out. It has a variety of noodles, rice, beans, rose petals, red scoops and bowls, and other miscellaneous red Valentine's Day gadgets. 
I have found that I always have to have some sort of scoop and container for my 2-year-old. She loves pouring the contents from one thing to another. 
In here, I also have a silicone heart tray. We play sorting games with this tray. For instance, I tell my 5-year-old to place all purple wagon wheels in the heart container, or place a certain number in each of the slots, or make a pattern with the beans, etc. 


Sunday, January 26, 2014

Baked Egg Rolls

My family loves fried egg rolls (http://workingmomwonders.blogspot.com/2013/11/homemade-egg-rolls.html). 
But, to have a more healthy alternative, I tried baked egg rolls tonight. They turned out really well. I didn't have any thawed chicken, so these became veggie egg rolls, but meat could be added very easily. 

Ingredients: 
1 head of napa cabbage
2 bags bean sprouts
2 cloves garlic
2 1/2 Tbsp cornstarch
2 Tbsp water
1 Tbsp soy sauce
1/2 Tbsp olive oil
2 tsp brown sugar
1 package egg roll wrappers
boiled chicken or cooked ground pork (optional)

I started by placing the napa cabbage, bean spouts, and garlic in a large pan. Let the cabbage cook down for about 4-5 minutes. 
Meanwhile, in a small bowl, mix the cornstarch, water, soy sauce, olive oil, and brown sugar. 
Add the sauce to the cabbage and bean sprouts. Let that cook for a couple more minutes. 

Scoop about 1/4 cup of mixture into each egg roll wrapper and roll-up. (Click on the egg roll link at the top of this page to see a rolling tutorial if you don't know how to roll them.) 

Spray your baking sheet with cooking spray. Then spray the tops of each of the egg rolls with cooking spray. 

Bake at 425 degrees for 15 minutes. 
Top with your favorite sauce--(sweet and sour, peanut, szechaun, etc.)


Saturday, January 25, 2014

Eclairs

I found this recipe on Pinterest (http://hiddenponies.com/2012/03/first-on-the-first-eclairs/)
They really were easy to make and taste just like they came from a bakery. 

Ingredients: 
Dough:
1/2 cup butter
1 cup water
1 cup flour
1/4 tsp salt
4 eggs

Filling:
1 small package of instant vanilla pudding
2 cups milk
1 cup heavy cream
1/4 cup powdered sugar
1 tsp vanilla
1/4 tsp salt

Chocolate topping:
1/3 cup chocolate chips
2 Tbsp butter
1 cup powdered sugar
1 tsp vanilla
2 Tbsp hot water

Start by boiling 1 cup of water and 1/2 cup butter in a saucepan. Reduce heat to low and add 1 cup of flour and 1/4 tsp. salt and stir. 
Remove from the heat. While stirring vigorously with a wooden spoon, add the eggs, one at a time. Stir well after each addition. 

Place the dough in a ziploc bag. Cut the tip off the end of the bag and pipe the dough on a greased baking pan. 

Bake at 450 degrees for 15 minutes. Then turn the oven down to 325 degrees and bake for another 15-20 minutes. 
Immediately poke a hole through each eclair. (I used a wooden skewer.) This hole will be used to let the steam out of the eclair and will serve as a spot to add the filling. Let the eclairs cool for about 30 minutes. 

Meanwhile, make the filling. 
Using a hand mixer, whip 1 cup heavy cream until soft peaks form. Add 1/4 cup powdered sugar, 1 tsp vanilla, and 1/4 tsp salt. 
In a separate bowl, mix the pudding and milk and let it set. 

Fold the whipped cream in with the pudding. 

Place the filling in a ziplock bag and cut the tip off the bottom of the bag. Pipe the filling in the pastry. 

For the chocolate topping: Melt 1/3 cup chocolate chips and 2 Tbsp butter in the microwave. Add 1 cup powdered sugar, 1 tsp vanilla, and 2 Tbsp hot water.
Spread chocolate on top of the pastry. 

Friday, January 24, 2014

March Madness Book Bracket

My boys are huge basketball fans. They can't wait to fill out the basketball bracket for March Madness. March is also Reading Month. To combine some of their favorite things, I created a March Madness Book Bracket for them. I gathered 32 of our favorite books and paired them up in a bracket. Each night, we will read two of the books paired against each other. This bracket will give us two books to read each night for the entire month of March. 
The bracket could be used for any level of books: children's, preteen, young adult, etc. I am going to make one for my high school classroom as well and have my students fill out the bracket. 

If you would like a copy of this blank bracket, comment below and I will email the template. 


A More Positive Outlook

The winter months in Michigan tend to bring not only snow and cold, but also stress and sometimes depression.  I personally found myself falling into a rut that left me with a “bad attitude”. 
            It is easy to fall victim to negativity in this society. Turning on the news or opening a social media site will give you many topics to become upset about.  Most of these issues are things that are completely out of our control, but it seems to make us feel better to get our emotions off our chest and hear that other people have the same feelings.
After realizing certain events had made me a victim of negativity, I realized I needed to make a change. As the New Year approached, I decided against setting the traditional New Year’s Resolutions: lose weight, exercise, save more money, etc.  I realized the one thing that would make this year better for me, and all those around me, is to be more positive.  I know… Easier said than done.
            But, then my husband shared a book with me called The Energy Bus, by Jon Gordon. He did a book study on The Energy Bus with his colleagues, and I saw the positive impact it had on him.  This book became the first step in my quest to become a more positive person. 
            The book provides the perfect analogy to help the reader understand they are the driver of their own bus. The type of energy you bring to your bus will determine the ride you have through life. The passengers you allow on your bus determine the attitudes you have along the ride and the productivity you will achieve in your quest to accomplish your goals.  
            I decided it was time to take over my own bus and drive those around me in a more positive direction. In what is likely to be the most challenging semester of my professional career, I decided that facing it with a negative attitude will not only make things more difficult for me, but will also have a negative impact on my family, friends, and students. 
            To become more positive, I started focusing on the things that make me happy. Family and friends, of course, but I needed something more specific to focus on. One thing I look forward to every day is the time I get to spend with my kids and husband after school. We set aside at least 15-30 minutes every night after dinner to doing an activity together, whether it is a seasonal craft, baking something together, or going for a walk. People often ask how I have time for all of these crafts and activities, but after reflecting on it, I realize that I don’t just do this for my kids, I also do it for myself. The time I share with them is more about keeping them occupied with new activities, it is time for me to escape from the daily stresses of life and just become a kid again with them, not worrying about hurrying from one thing to the next. This year, as I work to become more positive, I will continue to focus on these family activities to drive me through the day.
            I also realize the more positive I am in my classroom, the more positive my students will be.  Instead of constantly worrying about test scores and changing legislation, I am going to focus on making learning more enjoyable for them. There will always be laws and changes to complain about, but instead of letting those drive my attitude daily, I want to be driven by the light bulbs that go off when students understand a concept.
            I have so many positive things to focus on, both personally and professionally. I have realized that I am “too blessed to be stressed”. As we go through these long, cold, winter months, instead of becoming a victim to negative energy, I encourage you to try to find something positive to drive you through.


Wednesday, January 22, 2014

Toilet Paper Roll Cars

These cars are a huge hit with the boys. They don't take a lot of time and are a lot of fun.

Start by cutting out cardboard circles for the wheels. 
Cut a square out of the top of the toilet paper roll for the seat. Glue a small cardboard circle in the front of the cut-out for a steering wheel.  
Using fasteners, attach the wheels to the car. The kids can then decorate their cars any way they want. 


Monday, January 20, 2014

Buffalo Chicken Wraps with Homemade Chicken Strips

This is a quick dinner that works for the adults and kids. 
Preheat your oven to 400 degrees. 
Start with two large chicken breasts. Cut them into strips. 
Dip the strips in a bowl containing one beaten egg. Then coat the chicken strips in Kraft Oven Fry Extra Crispy Chicken. (I used the entire box.)
I placed the strips on a baking stone. They could also be placed on a greased baking pan. 

Bake for 20 minutes, or until chicken is completely cooked. 

The kids ate their chicken strips with their favorite dipping sauce. My husband and I put the chicken strips in a tortilla shell and added hot sauce, lettuce, tomatoes, shredded cheese, and ranch dressing to make a buffalo chicken wrap. 


Peace Craft for Martin Luther King, Jr. Day

For Martin Luther King, Jr. Day we decided to paint a peace sign. We taped the peace sign on a paper plate. 
The kids each painted their own plate.

When the paint dried, we took the paint off to reveal the peace sign. 

We talked about why we celebrate Martin Luther King, Jr. Day today. We watched some of the "I Have a Dream Speech", and my oldest tested his knowledge on the quiz located on the following website: http://www.infoplease.com/spot/mlkjrday1.html. 

Ice Cream Cone Waffles


We started yet another snow day with this breakfast "treat". I started by making waffles: 
2 beaten eggs
1 3/4 cups milk
1/2 cup canola oil
2 cups flour
4 teaspoons baking powder
1 Tablespoon sugar
1/2 teaspoon salt

Whisk all ingredients together until combined, being careful not to over-mix. Cook in a waffle iron. (This batch makes about 5 full-size waffles. You can divide this recipe in half if you don't want the extra waffles.) 

I cut the waffles to resemble an ice cream cone. Then I added sliced bananas to become the "ice cream". I put a little whip cream on top and a dab of homemade strawberry jam to resemble the cherry on top. 

Wednesday, January 15, 2014

Frozen Craft

My kids love the new movie, Frozen. I went in search of a craft tonight that had something to do with the movie. (They are anxiously waiting for it to come out on DVD!)

I went to this website: http://www.disney.co.uk/movies/frozen/activities. I printed off the Build a Snowman activity sheets. They love the snowman, Olaf, from the movie, so this was a perfect fit.

We cut out the snowman and they pasted the pieces on a textured piece of cardstock. David added some of winter stickers to his picture.

Sunday, January 12, 2014

Valentine's Day Wreath

I wanted a new seasonal wreath, so I pulled out some tulle and a Styrofoam circle and used the same technique I have used in the past to create other wreaths. 
I used pink, white, and sparkly black tulle. 
You will need to cut 18 inch strips of tulle. To make this easier, I cut a piece of cardboard 18 inches. I wrapped the tulle around the cardboard many times. Then I cut both ends to create the strips. 
Next, I tied the tulle to the Styrofoam ring. 
Start by wrapping the tulle around the ring. Take the right side piece and pull it over the left side piece and tie. 
Then take the left side piece and wrap it around the right side piece and tie tight. Think of it as a double knot. 
Here is the pattern I used. I did black, pink, white, pink, white, repeat until the whole ring was covered. 
There are a couple of ways you can display this wreath. If you slide all of the knots around the ring, this is the look you get...

I decided to keep mine like the picture below so I could hang some hearts in the middle. 
I cut a couple of hearts out of foam sheets I bought at Michael's. Any foam or paper hearts would work for this step. 
I cut a little hole in each of the hearts. Then I put a piece of thin string through each heart. 

I tied the strings around the wreath so the hearts came down at different lengths. (I would have used fishing line for this, but I didn't have any.) 
The final step was to tie a piece of black ribbon around the top and hang it on a Command hook. 

Saturday, January 11, 2014

Double Chocolate Swirl Bread

This bread is one of my family's favorite desserts. It looks like I spend hours preparing it, but it takes less than an hour for this to be on the table. 

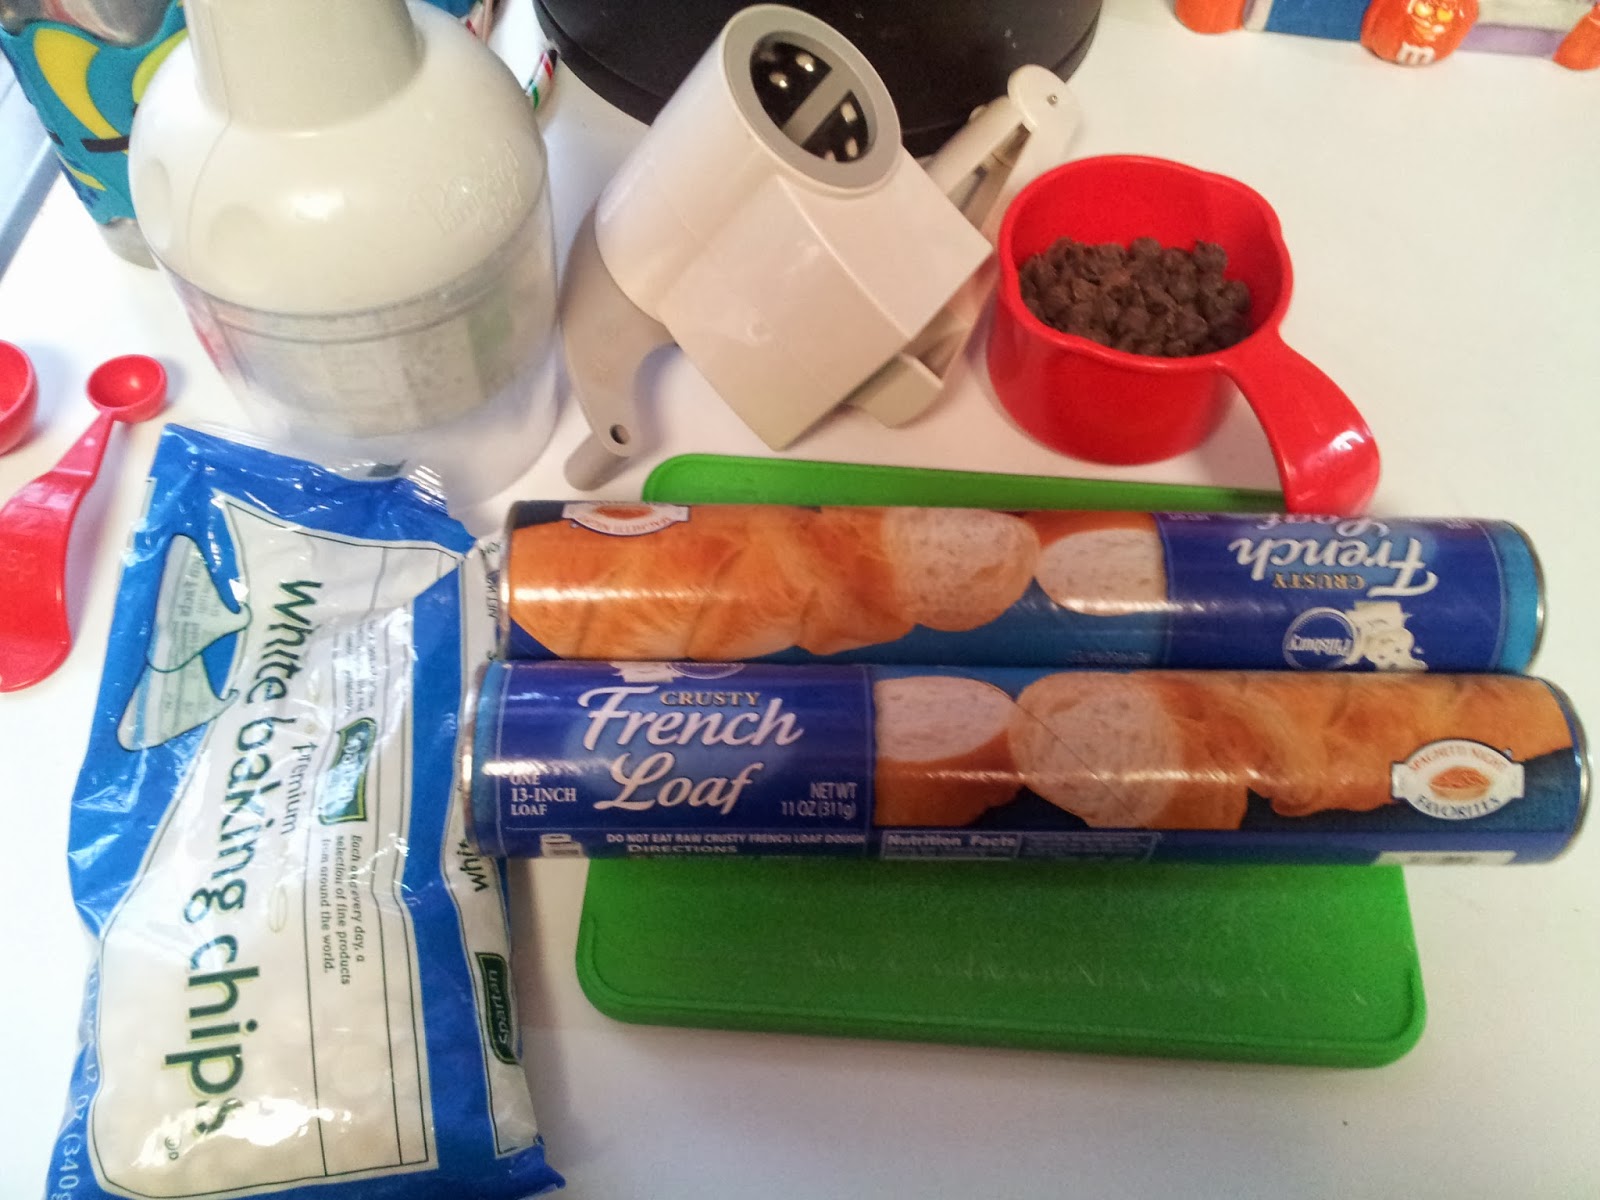
Ingredients: 
1/2 cup chopped nuts (I used cashews this time, but I have used sliced almonds in the past)
1/2 cup white chocolate chips
2 packages of Pillsbury French bread dough
1 egg white
1 Tbsp water
1/4 cup semi-sweet chocolate chips

Start by chopping the nuts and white chocolate chips. (I use a hand-held food chopper.) Mix them in a bowl and set aside. 
Roll out one loaf of the French bread on a lightly floured surface. Place an egg white and 1 Tbsp of water in a bowl and lightly beat the mixture with a fork. Brush a portion of the egg white on the bread dough. 
Using a hand-held grater, grate 1/2 of the chocolate chips on top of the bread dough. If you don't have a grater, just chop the chocolate chips like you did the white chocolate chips. 

Place half of the white chocolate/nut mixture on top of the grated chocolate chips. 

Unroll the 2nd tube of French bread directly on top of the first loaf. Pinch the edges with your fingers to seal the dough together. Brush on a portion of the egg white. 

Grate the remaining chocolate chips on top of the 2nd loaf and sprinkle the remaining white chocolate/nut mixture on top of that. 

Roll the dough up jelly-roll style. 

Pinch the dough to create a seam, as shown below. Cut the dough in half. 

I only have one large bread pan. So, I placed one of the halves in a greased bread pan. I cut the other half in half and placed each half in a smaller loaf pan. Make a deep cut down the length of each loaf, being careful not to cut through the ends. 

Bake at 375 degrees for about 25 minutes. Remove to a wire rack. 

Drizzle with melted chocolate if you want it to look a little fancier. 

Cut with a serrated knife and serve.